Your Cart (0)
Your cart is empty
Free express shipping

Drawer menu
Free express shipping

TL;DR:
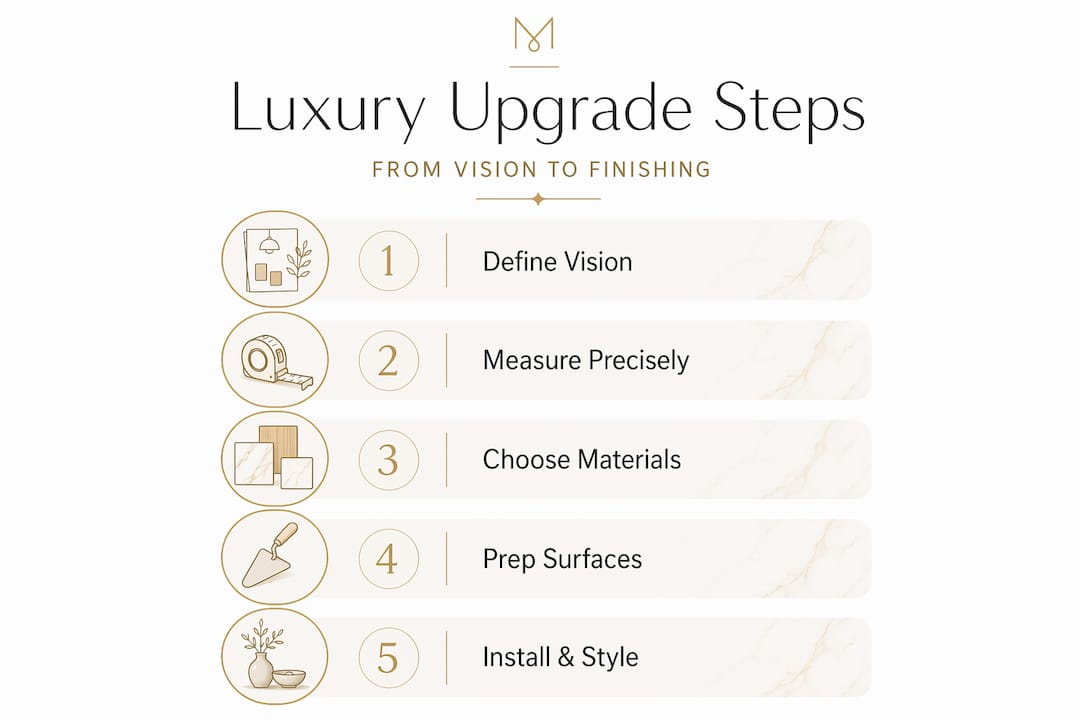
- A luxury interior upgrade using marble or travertine depends heavily on process, not just on selecting high-end materials.
- Careful planning, precise measurements, and expert installation ensure a seamless, durable, and timeless aesthetic.
A luxury interior upgrade using marble or travertine sounds straightforward until you’re standing in a half-demolished kitchen second-guessing every decision you made six weeks ago. The gap between a stunning finished space and a costly, drawn-out renovation usually comes down to process, not product. This step by step luxury interior upgrade guide gives you exactly what most guides skip: the sequenced, detail-level framework that keeps projects on track, on budget, and genuinely reflective of how you actually live. From first vision to final seal coat, here is how it gets done right.
| Point | Details |
|---|---|
| Clear vision first | Define your style, needs, and budget upfront to guide a smooth luxury upgrade. |
| Measure precisely | Accurate space documentation is essential for tailored marble and travertine design. |
| Budget realistically | High-quality stone upgrades range broadly; get multiple quotes for best value. |
| Modernize surfaces | Proper cleaning, repair, and finish choices refresh travertine for contemporary style. |
| Maintain regularly | Ongoing care including sealing and cleaning preserves beauty and durability. |
The single biggest reason luxury renovations stall or go sideways is not budget. It is starting too fast. Before you select a single slab or request one quote, you need a clear picture of what the finished space must accomplish. Clarifying objectives, style preferences, and functional non-negotiables keeps the entire project aligned with your lifestyle and goals, not just your mood on the day you walked into a showroom.
Start by separating wants from needs. A waterfall marble island edge is a want. Enough counter space to prep and plate a dinner party is a need. When you know both, you can allocate budget intelligently and avoid the painful mid-project compromise where something beautiful gets cut because something functional ran over budget.
Ask yourself these questions before any contractor or designer enters the conversation:
Pro Tip: Build a physical or digital mood board that includes not just finishes but lighting conditions, furniture scale, and how the room connects to adjacent spaces. Marble that looks perfect in isolation can feel cold or busy when the whole room comes together.
With a defined vision, you can now prepare your space and measurements for precise design.
Luxury fabrication is only as accurate as the data you give it. A premium marble slab cut to wrong dimensions is a very expensive mistake with no clean recovery. This phase is not glamorous, but skipping or rushing it causes more project delays than any other single factor.
Follow this sequence before any design or fabrication decisions are finalized:
Pro Tip: Have your contractor or fabricator do a site visit before finalizing any stone order. Even with perfect measurements, an experienced eye catches field conditions that change the plan.
Once measurements and documentation are ready, move to selecting materials and design concepts.
Material selection is where a luxury home makeover either earns its investment or becomes an expensive lesson in impulse buying. Grade, origin, veining pattern, slab thickness, and finish all affect both cost and long-term performance. Understanding the full picture before you commit is what separates experienced buyers from first-timers.
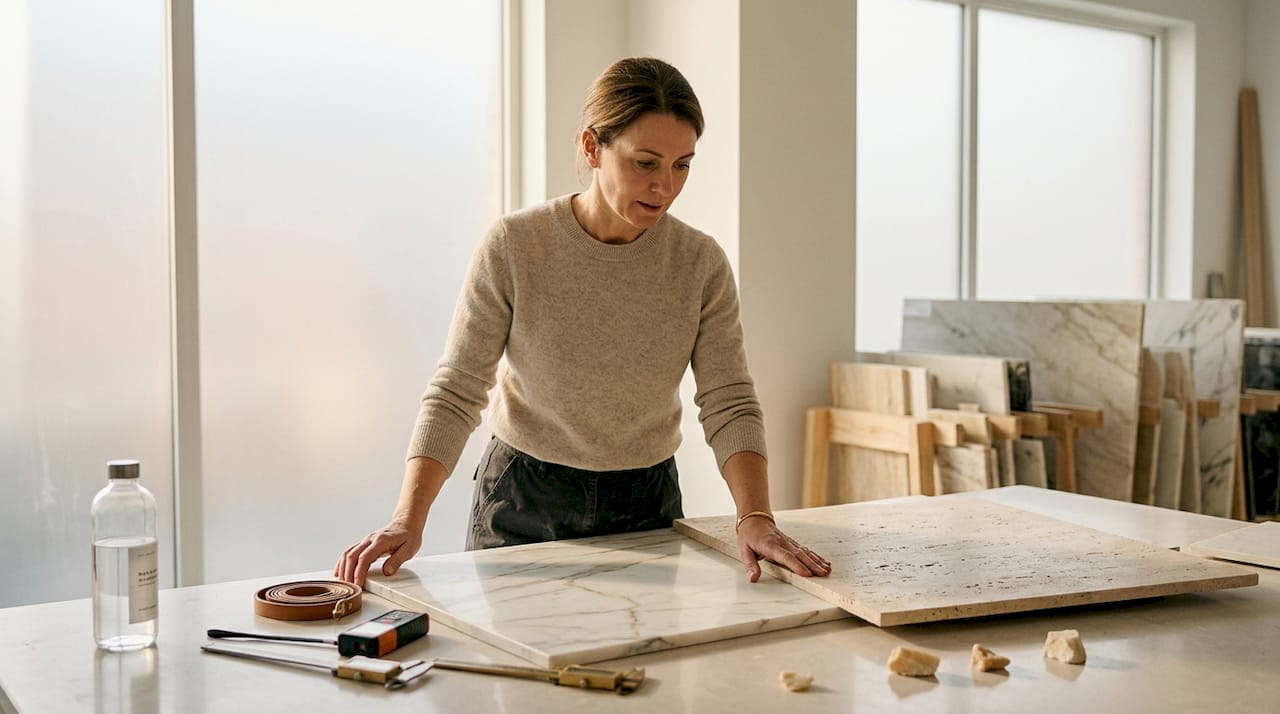
Installed marble countertops typically cost $40 to $200 per square foot, with fabrication charges, edge profiles, and installation complexity added on top. That range is enormous, and it exists because not all marble is the same. Calacatta Gold from a reputable quarry bears no resemblance in price or character to a lower-grade Carrara.
Here is a quick reference for the most common cost and complexity variables:
| Factor | Lower cost range | Higher cost range |
|---|---|---|
| Marble grade | Commercial/standard | Premium/bookmatched slabs |
| Slab thickness | 3/4 inch (2 cm) | 1.25 inch (3 cm) or thicker |
| Edge profile | Straight or eased | Ogee, mitered, or waterfall |
| Cutouts | Standard sink cutout | Custom fixtures, corbels, built-ins |
| Seam placement | Concealed, minimal seams | Complex layouts, visible seams |
| Travertine finish | Unfilled, honed | Filled, polished, custom finish |
Key considerations when finalizing your selection:
With your materials chosen and budget set, it is time to modernize and prepare your travertine surfaces.
If your project involves existing travertine, the preparation phase is where most of the transformation actually happens, long before any new product arrives. A nine-step travertine modernization workflow that includes deep cleaning, chip repair, finish selection, grout updating, and sealing is what turns dated stone into a contemporary design feature.
Work through these steps in order:
Pro Tip: Before regrouting the entire floor, test your new grout color on a small, inconspicuous section and let it cure fully. Wet grout and dry grout look completely different, and dry is what you live with every day.
After preparing surfaces, expert installation and styling transform your vision into reality.
Even the most beautiful slab becomes a liability if installed by someone without the skill or experience to handle it. This phase is where the difference between a good renovation and a great one is decided. Expert project management that oversees vendor coordination, scheduling, and quality control is what allows homeowners to focus on life while the details are handled.
Key principles for this phase:
“The difference between a good renovation and a truly luxury one is not the materials. It is the precision of the people who handle them and the care taken at every transition point.”
Pro Tip: Keep a running project log with dated photos at each phase. Beyond its value if disputes arise, it gives you an honest record of what was agreed versus what was delivered.
Luxury interiors earn their value over decades, not just on reveal day. Without proper ongoing care, even the finest marble or travertine begins to look neglected within a few years. Proper maintenance including professional resealing and use of specialized cleaners extends the lifespan and preserves value of these surfaces.
Build these practices into your regular routine:
Understanding maintenance completes the process; now consider an expert perspective on what luxury interior upgrades really require.
Here is something the typical luxury renovation guide will not tell you: the materials are almost never the source of client disappointment. The source is almost always communication, or the lack of it.
We have seen homeowners invest deeply in premium Calacatta marble only to end the project frustrated because nobody told them the installation was running two weeks behind. We have watched travertine floors that should have been showstoppers get overshadowed by a grout color that was never properly confirmed in writing. The luxury in renovations is not just materials but project management that allows homeowners to focus on life while experts manage details.
The clients who end up with spaces they love for decades are the ones who treated the project as a collaboration, not a transaction. They shared real lifestyle information. They asked hard questions about timelines and sequencing. They stayed engaged without micromanaging. And they worked with professionals who had the networks to source genuinely superior materials, not just whatever was in stock.
Personalization is also underrated in high-end decor ideas. The most memorable luxury spaces are not the most expensive ones. They are the ones that feel unmistakably like the person who lives there. When every decision, from marble veining direction to the warmth of the grout color, reflects considered taste rather than a showroom default, the result is a home that feels elevated every single day.
If you are ready to move from planning to selecting, Marmorique offers a curated collection of premium marble and travertine pieces that bring the full vision of upgrading your living space into focus. From handcrafted stone lamps and tables to complete bathroom sets, every piece is selected for natural beauty, material integrity, and lasting design quality.
Whether you are a homeowner refining a single room or a designer sourcing for a complete luxury renovation guide, Marmorique’s artisanal stone decor fills the gap between raw material and finished interior with pieces that are already at home in elevated spaces. Explore the collection, find products that match your design direction, and experience the difference that real craftsmanship makes when every detail matters.
The first step is clarifying your objectives and preferences before any material selection or contractor conversations begin, ensuring every subsequent decision serves your lifestyle and goals.
They are non-negotiable. Collecting wall-to-wall dimensions, door positions, and utility points before finalizing any stone order prevents costly fabrication errors and ensures a perfect fit.
Installed marble countertops range from $40 to $200 per square foot, with the final number depending on marble grade, slab thickness, edge profile complexity, and installation conditions.
Professional resealing every 6 to 12 months is the standard recommendation, with higher-traffic surfaces requiring attention on the shorter end of that range to maintain protection and appearance.


